A DIY DSLR Cooler Project
projectsThe main camera I’ve been using is a QSI 683 CCD mono camera. One of the main benefits of scientific grade cameras for astrophotography is the regulated cooling it provides. While there are many types of noise that may occur in an image, thermal noise is particularly problematic for low-light and long exposure photography, and is one of the primary challenges with DSLR cameras for astrophotography.
The most robust method of cooling for a DSLR is to disassemble the body and chill the cooler actively, typically with a Peltier device. The cooling can be applied directly (or nearly so) to the CMOS or CCD chip, and regulated to maintain a fixed temperature. Regulated cooling is nice because at a fixed temperature, it’s easier to acquire matching dark/bias frames, and the noise is consistent throughout the imaging session. But, this method is expensive and for infrequent and daytime use, this may not be feasible.
I’ve read a few experiments from folks in various forums about various cooler ideas and I was intrigued to give it a shot. The challenge with this cooler is that it requires dry ice – which may or may not be practical to obtain. My local grocery store happens to carry it (at the cost of $1 per pound) – so I decided to grab a few items laying around the house, plus order a few more, and construct a simple cooler. Dry Ice will sublimate roughly 10 lbs a day and I use about 1 lb during the night. Penguin Dry Ice has a store finder here.
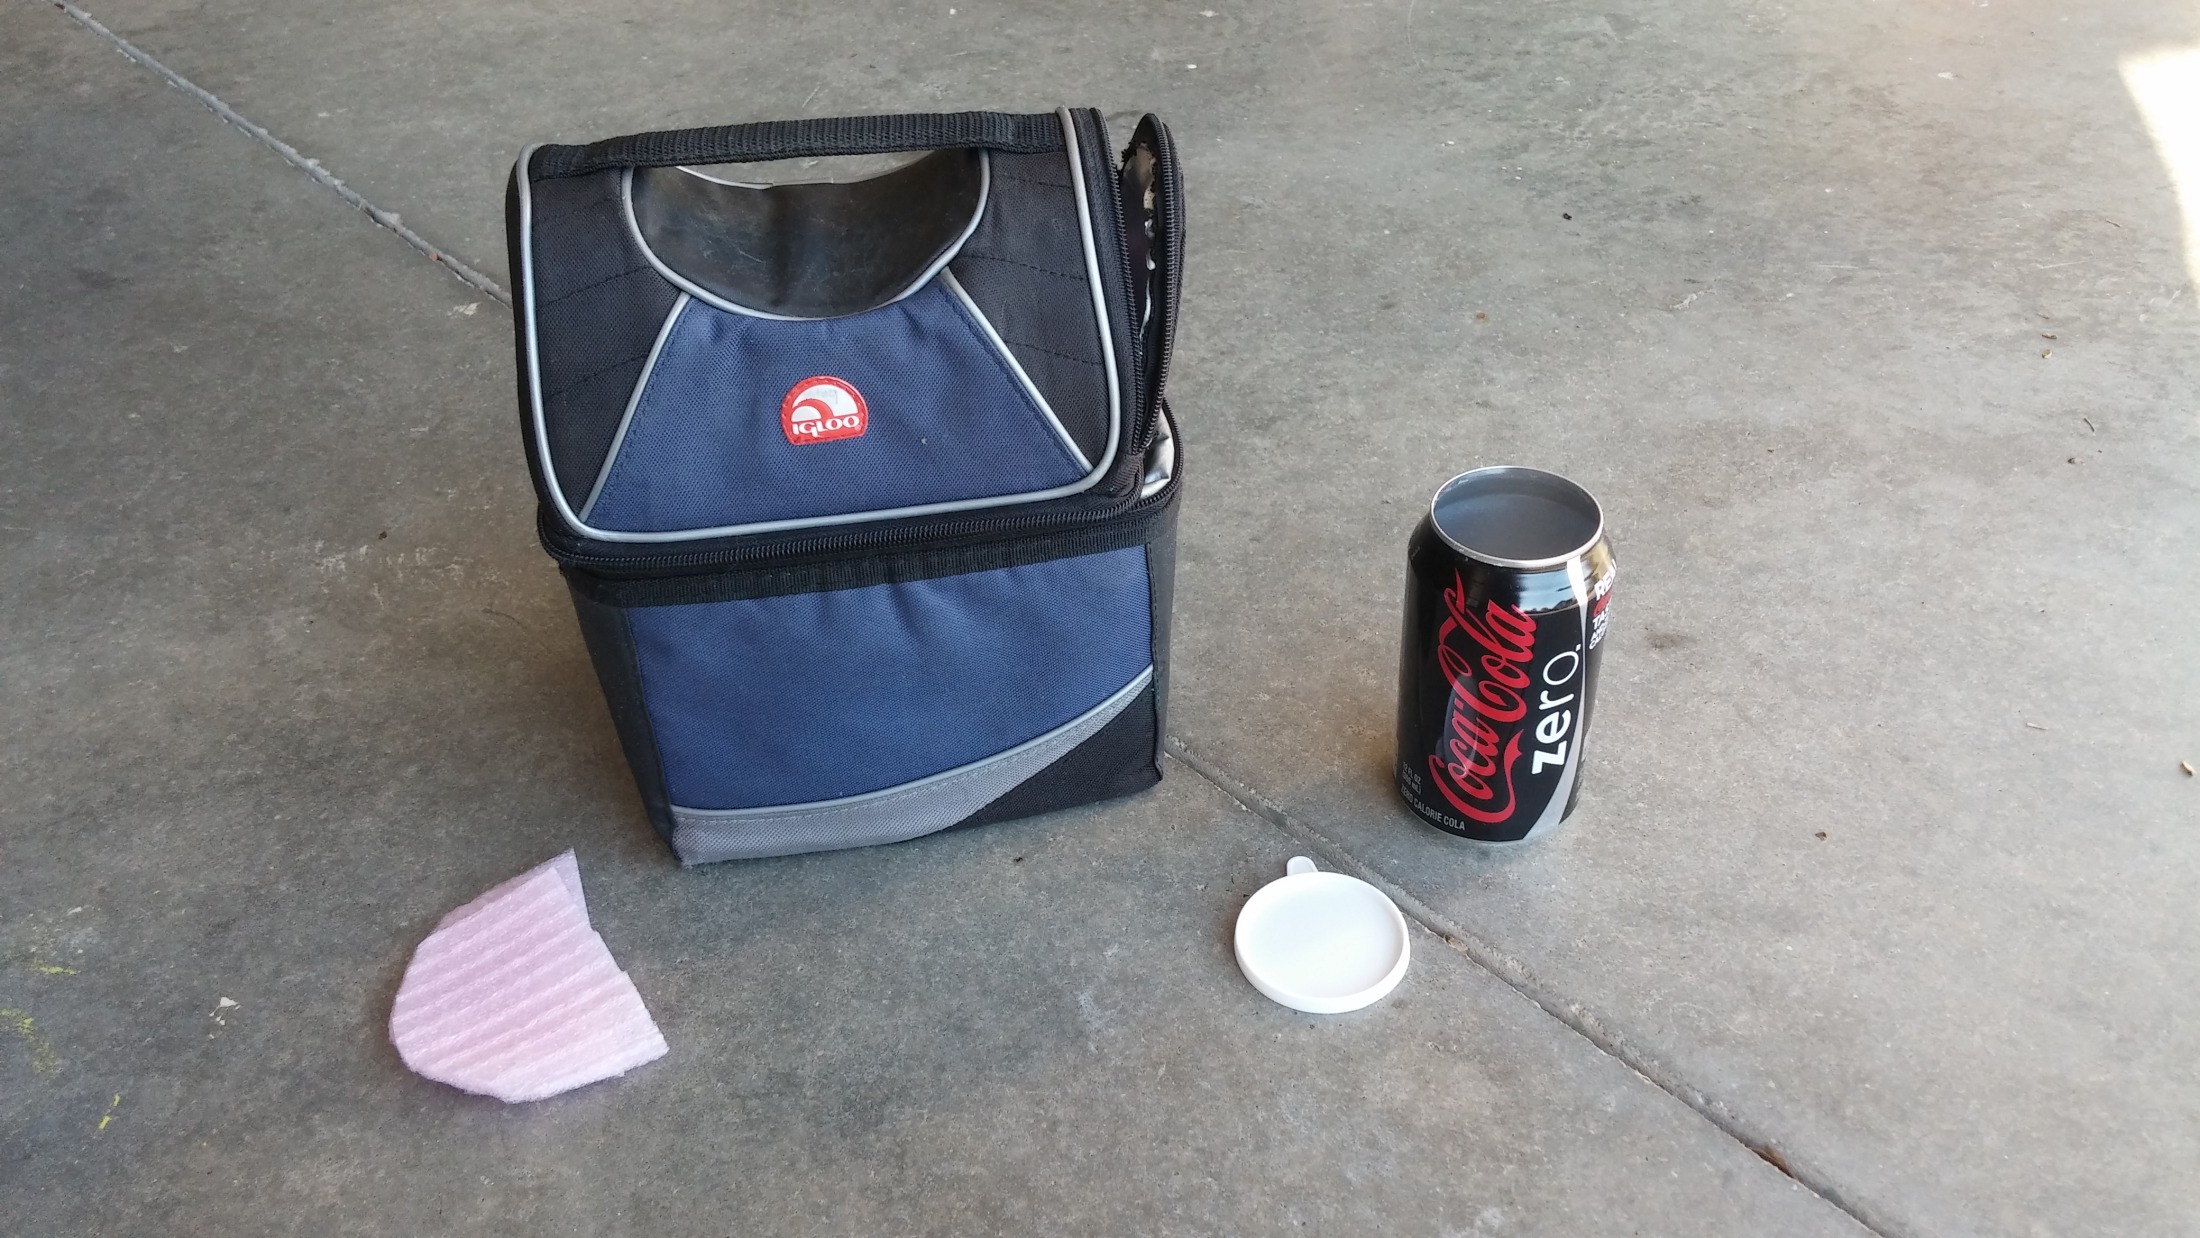
The cooler itself is simple. It’s constructed from a small lunch bag cooler that happens to have a separate compartment for a soda can. This works well, as I decided to use a soda can as a dry ice hopper. While copper would be a better conductor, I think aluminum here is better suited to the task. Plus, this makes the hopper the cost of a soda can – very easy to swap in/out in a few seconds.
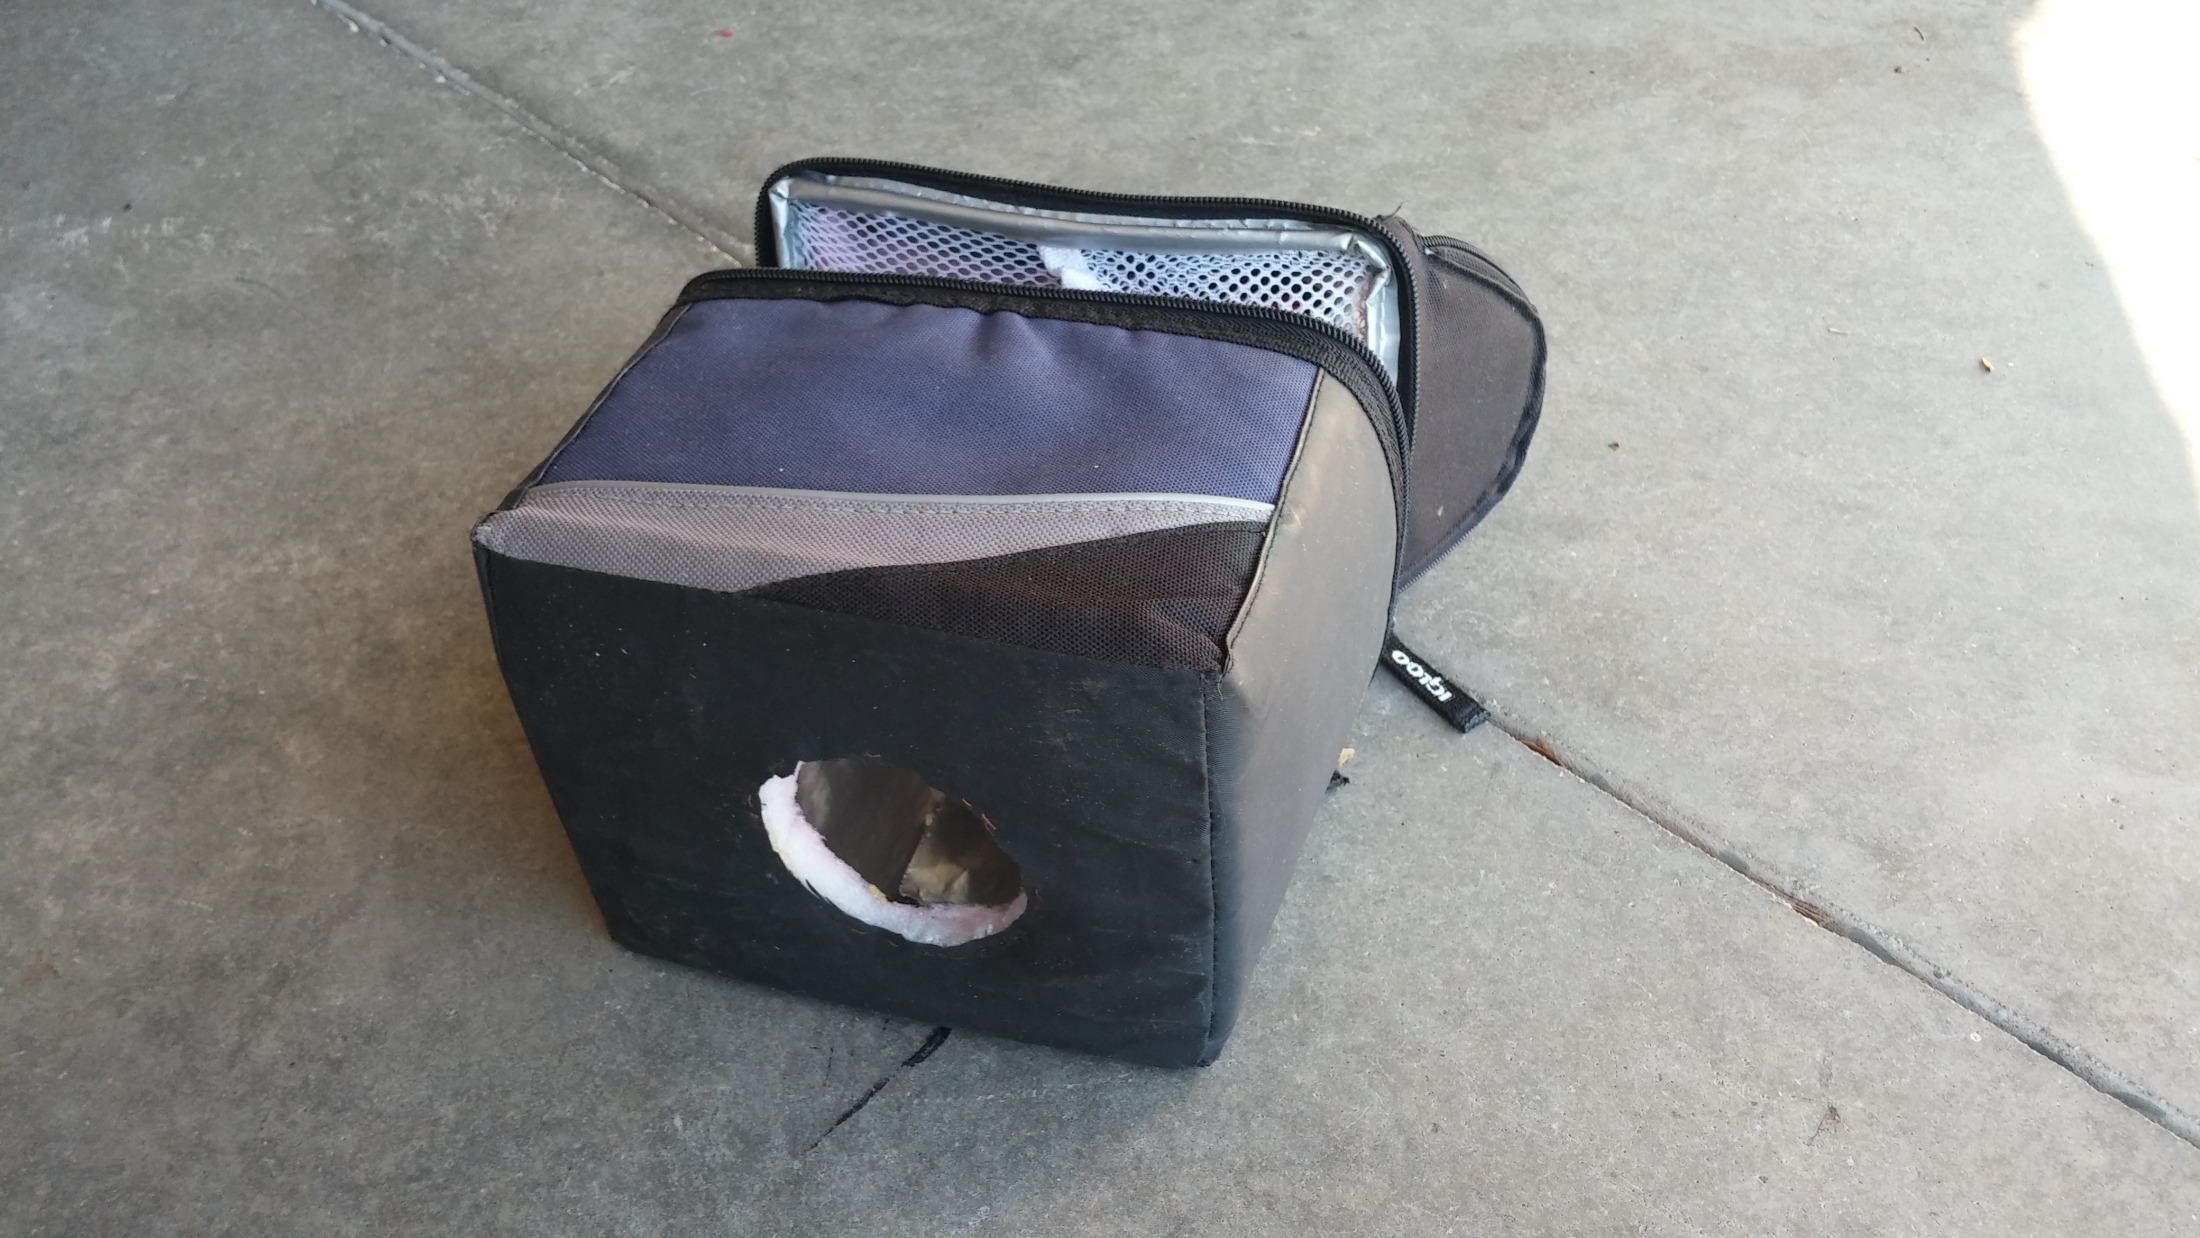
At the bottom of the cooler, I’ve cut a hole big enough for the T-mount and any adapters I may use. The offset from center is intentional to fit the camera:
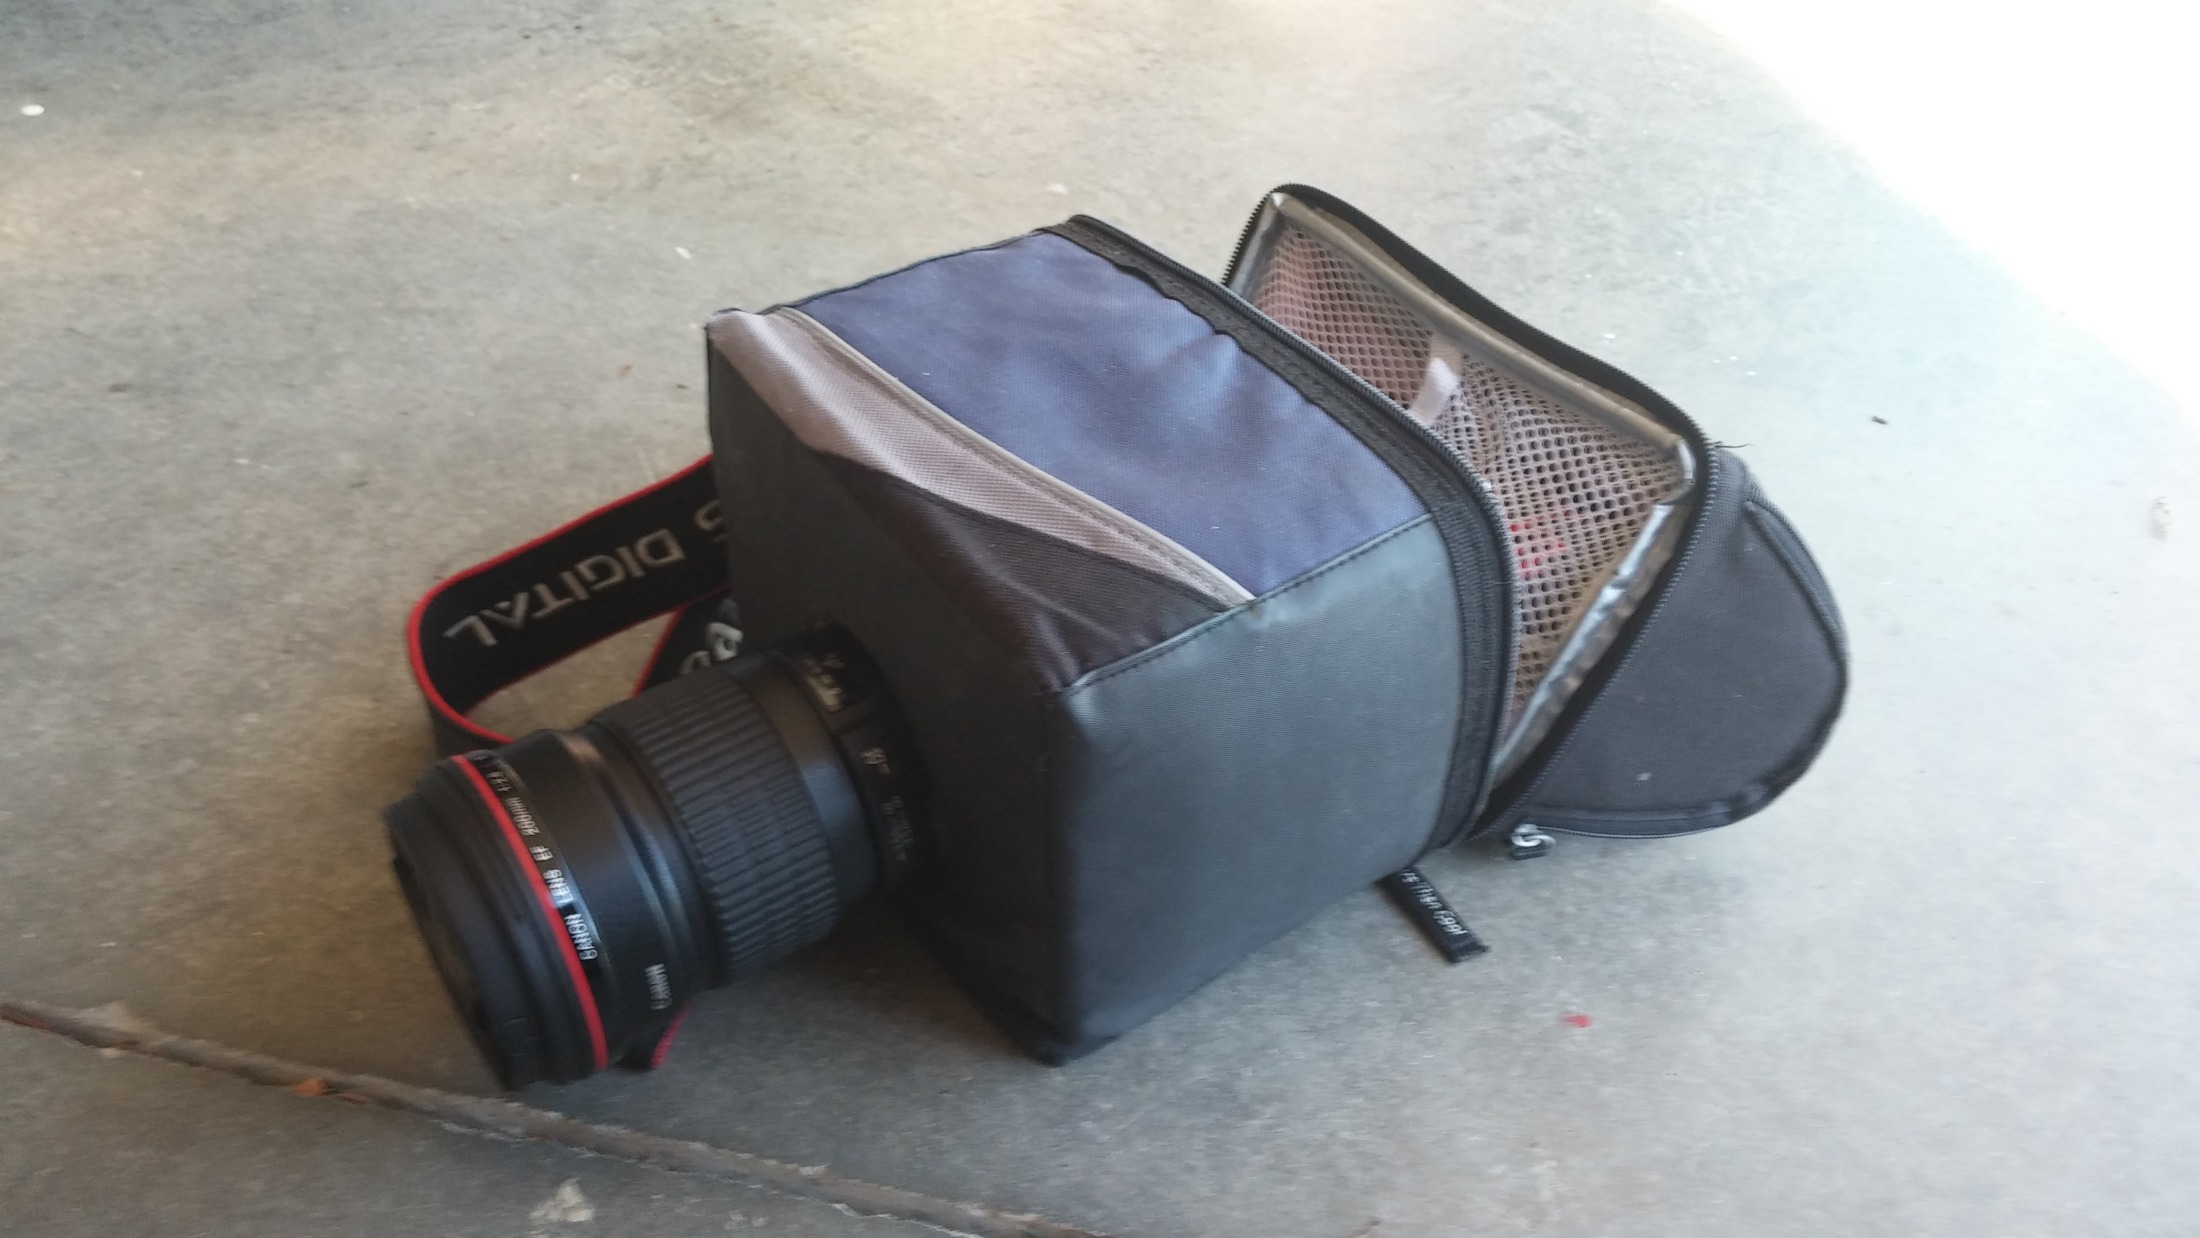
Here’s an example with the 200mm lens attached (notice the ‘cooling can’ in the can section):
Now let’s test.
With an ambient temperature around 32C, the test began by giving the cooler, with 3 small pieces of dry ice, a half hour cool down time. A series of 47 4-minute dark frames (lens cap on) were taken with a 1 minute pause between exposures (each frame number represents roughly 5 minutes), and here is the resulting graph (ignore the blue noise line that shows standard deviation, more on that later):
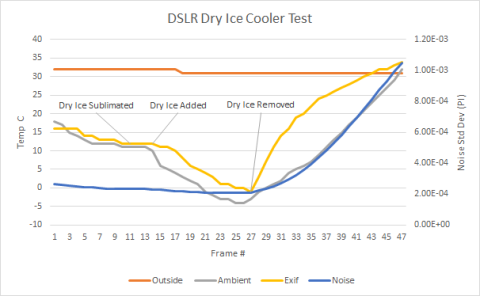
Outside (orange) represents the ambient temperature outside – air temp. Ambient (grey) is the temperature inside the cooler, while Exif (yellow) is temperature reported by the camera. The Exif temp (ordinarily) should be higher than the ambient temperature – in frame 1, that’s not the case, likely because the camera was idle until this point and the cool down period got the internals quite cold.
By frame 11, the small amount of dry ice had sublimated completely (about 1.5 hours at this point), and explains the plateau. More dry ice was added at frame 13. Most of the dry ice was still in the hopper at frame 27, but I removed it to see how fast the temperature would climb – and it did so quickly.
Using PixInsight, I measured the noise using the NoiseEvaluation script and plotted the results on the blue line above. What this shows is that while noise does decrease with cooling, it rapidly increases as the camera warms up. This is better illustrated by looking at the percentage change from the first frame:
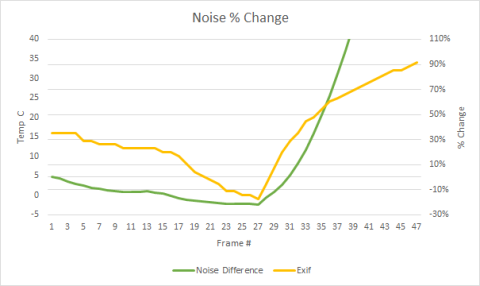
The first frame is the benchmark, so there’s 0% change in noise. By frame 27, there’s a reduction of just more than 20% of the noise – a visually noticeable amount, but what surprised me most is how quickly the noise climbed once cooling was disabled. At frame 47, the noise has climbed 300% from frame 1. (The scale was limited so detail could be seen in the cooling trend line.)
Based on this, we should see a reasonably good frame at frame 1, an even better frame at frame 27, and a very noisy frame at frame 47. Applying the same stretch to each in PixInsight confirms this (from left to right: frame 1, frame 27, and frame 47):
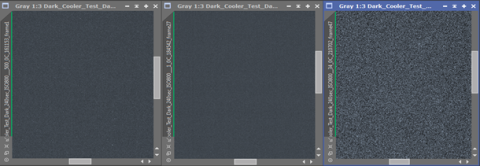
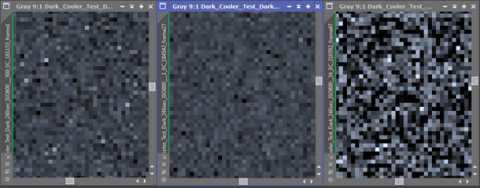
Magnified:
Condensation
I did not observe any condensation, but the can did have frost. I did place 2 dessicant containers inside the cooler to help with moisture. A better design would be to seal the camera with dessicant to keep moisture out as best as possible.
Conclusion
While not fancy, the results are impressive: the cooler showed a drop of 36C while the Exif showed a drop of 31C. As a general rule (not just for this test), Exif temp is typically around 10c higher than ambient. The sweet spot for thermal noise reduction seems to require the camera to be 10C/50F or lower – meaning the ambient needs to be around freezing: a hard target without some kind of cooling.
Constantly purchasing dry ice and storing it for trips is a big disadvantage – however, as an inexpensive option for occasional use, the thermal noise in the image can be reduced drastically.